Notion for Beginners: How to Use Notion in 7 Simple Moves
New to Notion? Learn how to use Notion in seven simple moves, from getting around to finding things fast, so you can start using a ready-made template today.
Notion can feel strange the first time you open it. There’s no toolbar full of options, no obvious “start here”, and a lot of words like blocks, databases and views. If you’ve mostly used spreadsheets, email and the software your field hands you, that blank calm can look more like a puzzle than a tool.
Here’s the good news: you don’t need to learn Notion to use a ready-made Notion template. Someone has already built the structure. You only need a handful of moves, the same seven over and over. This guide walks through each one in plain language, with the mouse, the keyboard and your phone, then covers the few things that trip people up in the first week.
Notion updates its look now and then. If a button in this guide looks slightly different on your screen, the idea behind it stays the same. Last checked: September 2026.
What Notion is, in one minute
Notion is a workspace made of pages. A page can hold text, checklists, images and links, and it can hold other pages inside it, like folders that are also documents.
Some pages are special: they hold a database, which is a collection of similar items. Clients, shoots, tasks, invoices and home repairs are all databases. Each item in a database is its own page, and each one has the same set of details, called properties: a date, a status, an amount, a checkbox.
That’s the whole model:
- Pages hold things.
- Databases hold lists of similar things.
- Properties are the details every item in a list shares.
- Views are different ways of looking at the same list.
Everything below builds on those four ideas.
Before you start: get your own copy
A template shared on the web is a read-only page. You can look around, but you can’t type in it. To use it, you make your own copy:
- Create a free Notion account at notion.com if you don’t have one, and sign in.
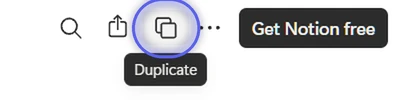
- Open the template link and click Duplicate in the top-right corner. It’s a small icon of two overlapping squares; hover over it and its name appears. If you have more than one workspace, Notion asks which one to use. On the Notion Marketplace, paid templates have a Purchase template button with the price, and free ones a Get template or View template button.
- The copy appears in your own Notion, under Private in the sidebar on the left. Nobody else can see it unless you share it.

If you don’t see a Duplicate button, sign in to Notion and reload the page. And if you ever find yourself unable to type anywhere, you’re almost certainly looking at the web page, not your copy: open Notion itself and find the template under Private.
What not to put in Notion
Treat Notion like any cloud app: great for business admin, but not the place for passwords, card numbers or clinical notes. Notion’s standard plans aren’t set up for protected health information. If you’re a therapist or health professional, keep session notes and diagnoses in your practice’s records system, and use initials or client codes in Notion. Passwords belong in a password manager.
Move 1: Get around
Notion has two ways of moving between pages.
- The sidebar on the left lists your pages. Hover over a page and click the small arrow that appears to see the pages inside it. To hide the sidebar for more room, click the « icon at its top, or press
Ctrl + \on Windows orCmd + \on a Mac (the backslash key, usually just above Enter). Do the same to bring it back. - Links inside pages. A good template has a navigation bar at the top of every page: a row of links such as Home, Clients, Invoices. Click one to jump there.
At the top of every page there’s also a trail of page names showing where you are. Click any name in it to go back up a level. The back arrow works too.
Move 2: Open a record
Every card on a board and every row in a table is a page in its own right. How you open it depends on the view:
- On a board, calendar or gallery: click the card’s title.
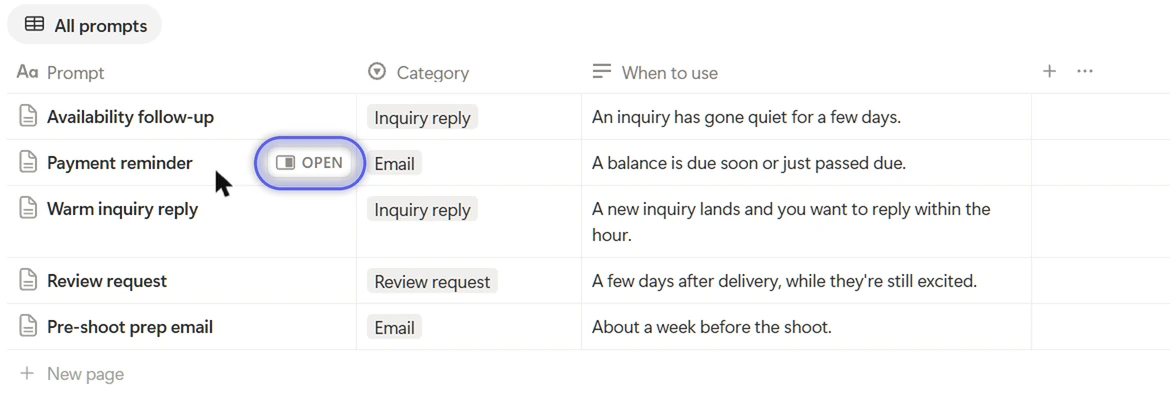
- In a table: hover over the row’s name and click the Open button that appears. Clicking the name itself only lets you rename it, which surprises almost everyone the first time.
- In a list: click the item’s name.
Most templates open records in a panel on the side or in the middle of the screen, so you don’t lose your place. Inside you’ll see the item’s properties at the top (dates, status, amounts) and room for notes and checklists underneath. To give it the whole screen, click the expand icon in the panel’s top-left corner. Close the panel with the Esc key or by clicking outside it.
Move 3: Add something new
To add a new client, task, shoot or repair:
- Click the blue New button above the list, usually in its top-right corner, or
- Click + New page at the bottom of a table or under a column on a board. On a calendar, hover over a day and click the + that appears.

A blank record opens. Give it a title, fill in the details you know, and close it. Empty details may be tucked under a line such as “3 more properties”; click it to see them all. The new item now appears in every view of that list.
Many templates also include big buttons such as “New inquiry” or “Log an expense” on the Home page. Those do the same job with a few details filled in for you.
To delete an item you added by mistake, open it, click the ••• menu at the top and choose Move to Trash.
Move 4: Edit a detail
Properties are edited right where you see them:
- Text and numbers: click and type.
- Dates: click to open a small calendar and pick a day.
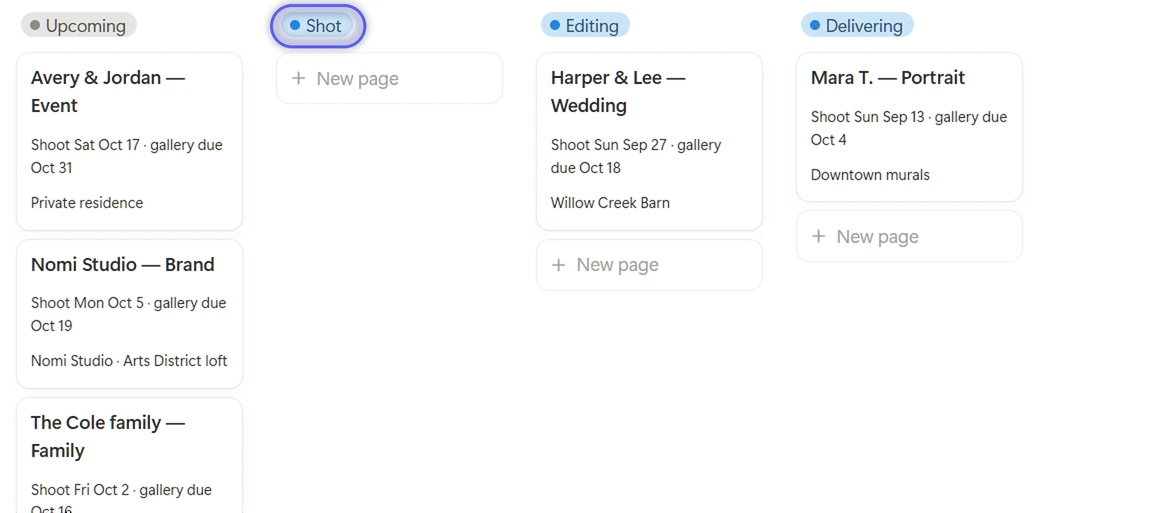
- Select and status: click to open a short list of options and pick one. On a board, you can also drag a card from one column to another, which changes the detail the board is grouped by, usually its status.
- Checkboxes: one click.
Some properties are formulas: they calculate themselves from other details, like a due date or an “overdue” label. You can’t type in them, and that’s on purpose. Change the details they depend on and they update.
Move 5: Switch views
Above most databases you’ll see a row of tabs such as Table, By stage, This week or Calendar. These are views, and this is the idea that makes Notion click for most people:
Every view shows the same list, just arranged differently.
A board groups items into columns by status. A table shows every detail in rows. A calendar places items on their dates. A filtered view might show only what’s due this week. Adding, editing or deleting an item in one view changes it everywhere, because there’s only one list underneath.
Click a tab to switch. If a list has more views than fit, the extra tabs sit under a “more” tab at the end of the row. You don’t need to create or change views to use a template; the useful ones are already set up.

Move 6: Use the buttons
Ready-made templates often include buttons that do several steps in one click:
- Mark done on a recurring task might record today’s date and move the next due date forward.
- Log 15 min might add a time entry for today and link it to the right client.
- Clear sample data hides the example records so you can start fresh, and a matching button brings them back.
Buttons appear either on a page (a labeled block you click) or inside a record, next to its other properties. Read the label, click once, and watch what changes. If a button asks you to confirm, click Continue: it’s a safety check before it changes several things at once.
Move 7: Find anything fast
- Search: press
Ctrl + PorCtrl + K(Windows), orCmd + PorCmd + K(Mac), or click Search in the sidebar, and type any word. It searches titles and text across your whole workspace.

- Favorites: open a page you use daily and click the star at the top of the page (or choose Add to Favorites from the ••• menu). It’ll appear under Favorites in your sidebar.

On your phone
Install the Notion app for iPhone or Android and sign in with the same account. Everything syncs, and the same seven moves work with taps:
- Tap a card or a row to open it; swipe down or tap the back arrow to close it.
- Tap the view name at the top of a list to switch views.
- Your Favorites appear in the phone app too, which makes it far easier to live with. Star your Home page first.
- Buttons work on the phone as well: tap once and watch what changes.
The things that trip people up in week one
“I can’t type anywhere.”
You’re viewing the shared web page, not your own copy. Duplicate it (see “Before you start”) and use the copy under Private in your sidebar.
“I clicked a name and nothing opened.”
In a table, clicking the name lets you rename the item. Hover over the row and click Open instead. Nothing is broken.
“I deleted something by accident.”
Press Ctrl + Z or Cmd + Z straight away to undo. If it’s too late for that, open Trash at the bottom of the sidebar (on a phone, it’s in the ••• menu at the top of the sidebar) and restore the page. Deleted pages stay in Trash for 30 days on every plan, including free.
“The example data is confusing.”
That’s what the sample data is for: to show the template working before you add your own. When you’re ready, use the template’s Clear sample data button, or delete the examples one by one. Many people keep them for a week while they learn.
“I added something and it’s not showing in this view.”
Views can be filtered. A “This week” view won’t show an item due next month, and a board may hide finished items. Check another view such as All or the full table; your item is there.
“Should I change how it’s built?”
Not at first. Use it as it comes for a couple of weeks. Once you know what you’d change, rename options, add a property or hide what you don’t need. You can’t break anything that Undo and Trash can’t fix.
“Why can’t I add a column? It says Locked.”
Many ready-made templates, including ours, come with their lists locked, so a stray click can’t rearrange a layout or change a formula. A small Locked badge sits above a locked list. You can still add, edit and delete anything in it, and you can still sort and filter; those changes are just for you and aren’t saved into the layout.
When you want to make the template your own, for example adding a column, renaming a status or creating a new view, unlock the list: click its Settings (the sliders icon at the top right of the list) and, under Data source settings, choose Unlock database. On a list that’s shown inside another page, the same menu says Unlock views. Lock it again the same way when you’re done.
A 10-minute practice run
Open your template and try each move once:
- Hide and show the sidebar, then use the navigation bar to visit every main page.
- Open one example record and close it again.
- Add one real item with New and fill in two details.
- Change a status on a board by dragging a card, then drag it back.
- Switch between two views of the same list and find your new item in both.
- Press one button and notice what it changed.
- Search for your new item by name.
- Star the Home page and open it in the phone app.
That’s genuinely most of what daily use involves. Everything else is detail.
Ready-made templates built for beginners
Every Logic Theory Lab system is designed for people who don’t want to learn Notion first. Each one has a navigation bar on every page, a ten-minute guided Start Here, example data with a one-click clear button, and a short “New to Notion?” page that walks through these same seven moves using the template’s own records. Browse them on the systems page.
FAQ
How do I use Notion for the first time?
Create a free account, duplicate a ready-made template into your workspace, and learn the seven moves above: get around, open a record, add something, edit a detail, switch views, use the buttons, and search. A template gives you a working structure on day one, so you learn by using it rather than by building from a blank page.
Is Notion free? Do I need Notion AI?
Notion has a free plan, and it’s enough for one person working on their own with a template like the ones described here. If you later add a second member to your workspace, the free plan starts limiting how much you can add, and paid plans add longer page history and team features. None of the moves in this guide need Notion AI.
Can I use Notion offline?
Yes, in the desktop and phone apps (not in a web browser). Open a page, click the ••• menu and switch on Available offline. On the free plan you do this one page at a time, and a few things, like buttons, wait until you’re back online. Changes sync when you reconnect.
Can I share my copy with a partner or assistant?
Yes. Use Share at the top of a page to invite someone to that page. Inviting a person to a page is different from adding them as a member of your whole workspace, and on the free plan adding members brings in usage limits, so start with sharing the page.
What if I get stuck?
Most templates include a way to contact the creator. Notion’s own help center also has short articles on every feature, searchable by the name of the thing you’re trying to do.